NRA Admin / Leadership
The NRA Admin represents a National Regulatory Authority within the SEARN network. Once your NRA has been onboarded by the Secretariat, you take ownership of everything inside your authority's boundary: bringing your team onto the platform, defining who can do what, tailoring the competency framework and training catalogue, tracking your team's progress, and keeping your organization's profile current.
Onboard & Manage Your Users
The story: You have just been onboarded and now need to get your authority's staff onto the platform — adding people, updating details as roles change, and removing access when someone leaves.
Goal: Keep your NRA's user list matching your real-world team.
Navigation: Left Navigation → Users
Deleting a user is permanent
It removes their access. Confirm you have the right person first.
- Click Users in the left navigation.
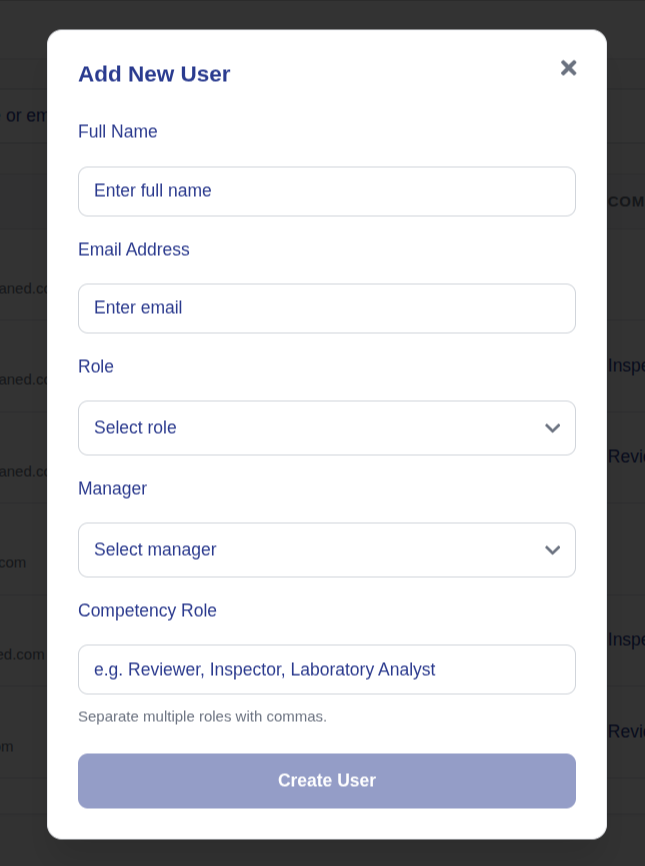
- To add someone: click + Add User, enter their full name, email, role, manager, and competency role, then click Create User.
- To update someone: select them from the list, edit their information or role, and save.
- To remove someone: select the user, click Delete, and confirm.
What each field means:
Role: what the person can do on the platform (for example Manager or Staff).
Manager: who this person reports to within your NRA.
Competency Role: the role used to match this person against the competency framework and trainings.
Outcome
Your NRA's staff list matches its real team, with each person able to log in and act according to their role.
Manage Roles & Their Permissions
The story: Not everyone on your team should be able to do everything. You shape roles so each person sees and does only what fits their responsibility.
Goal: Define roles specific to your NRA's structure.
Navigation: Left Navigation → Roles
- Click Roles in the left navigation.
- Open an existing role to see what it allows, or click + Add New Role to create one specific to your NRA.
- Select or remove permissions as needed.
- Save the changes.
Outcome
Every team member's access reflects exactly the responsibility they hold.
Add an NRA-Specific Competency Framework
The story: The SEARN-wide framework covers the network broadly, but your NRA has its own competencies. You extend or customise the framework so locally-created trainings map to what matters for your authority.
Goal: Create a competency framework specific to your NRA.
Navigation: Left Navigation → Competency Framework → NRA-Specific Competency Framework
- Click Competency Framework in the left navigation.
- Click the NRA-Specific Competency Framework tab.
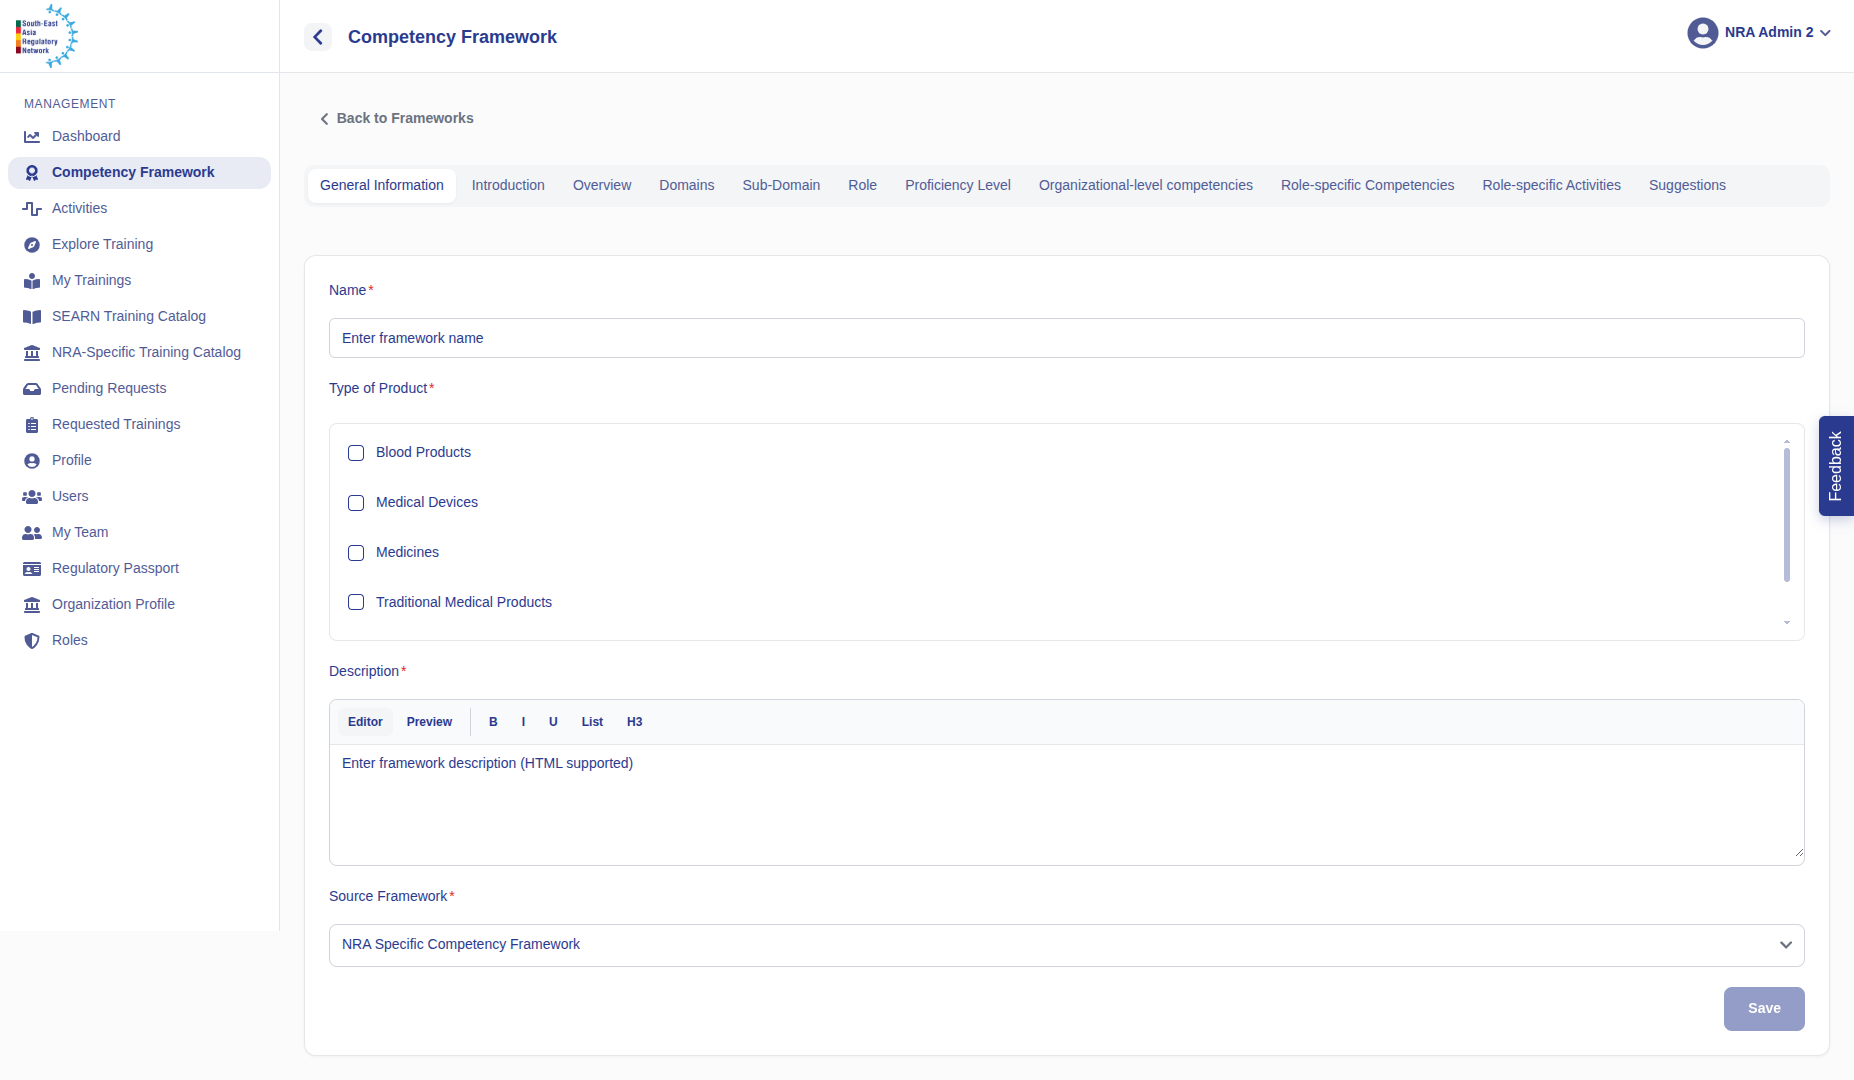
- Click + Create Framework.
- Work through each step: General Information, Introduction, Domain, Sub-Domains, Role, Proficiency Level, organizational and role-specific competencies, and role-specific activities.
- Review the entered competencies for accuracy.
- Click Save.
Outcome
Your NRA's own competency set is live and available for tagging trainings.
View the SEARN-Wide Training Catalogue
The story: Before creating anything new, you check what already exists across the whole network — so you avoid duplicating effort and can spot gaps.
Goal: See network-wide training coverage.
Navigation: Left Navigation → SEARN Training Catalogue
- Click SEARN Training Catalogue in the left navigation and make sure the view is scoped to SEARN-wide.
- Filter by Competency Domain to see what is already covered.
Outcome
You have a clear picture of network-wide coverage before deciding what your authority still needs to build.
View Your NRA-Specific Training Catalogue
The story: Now you narrow the view to just your own authority, checking whether every locally-important competency has a training mapped to it.
Goal: See your NRA's own training coverage.
Navigation: Left Navigation → NRA-Specific Training Catalogue
- Click NRA-Specific Training Catalogue in the left navigation.
- Review the trainings mapped against your NRA-specific competency framework.
Outcome
You know exactly which local competencies still need a training created.
Upload an NRA-Specific Training
The story: With your framework in place and gaps identified, you upload trainings for the competencies that need coverage.
Goal: Create a training in your NRA catalogue.
Navigation: Left Navigation → NRA-Specific Training Catalogue
- Click NRA-Specific Training Catalogue in the left navigation.
- Click Create Training.
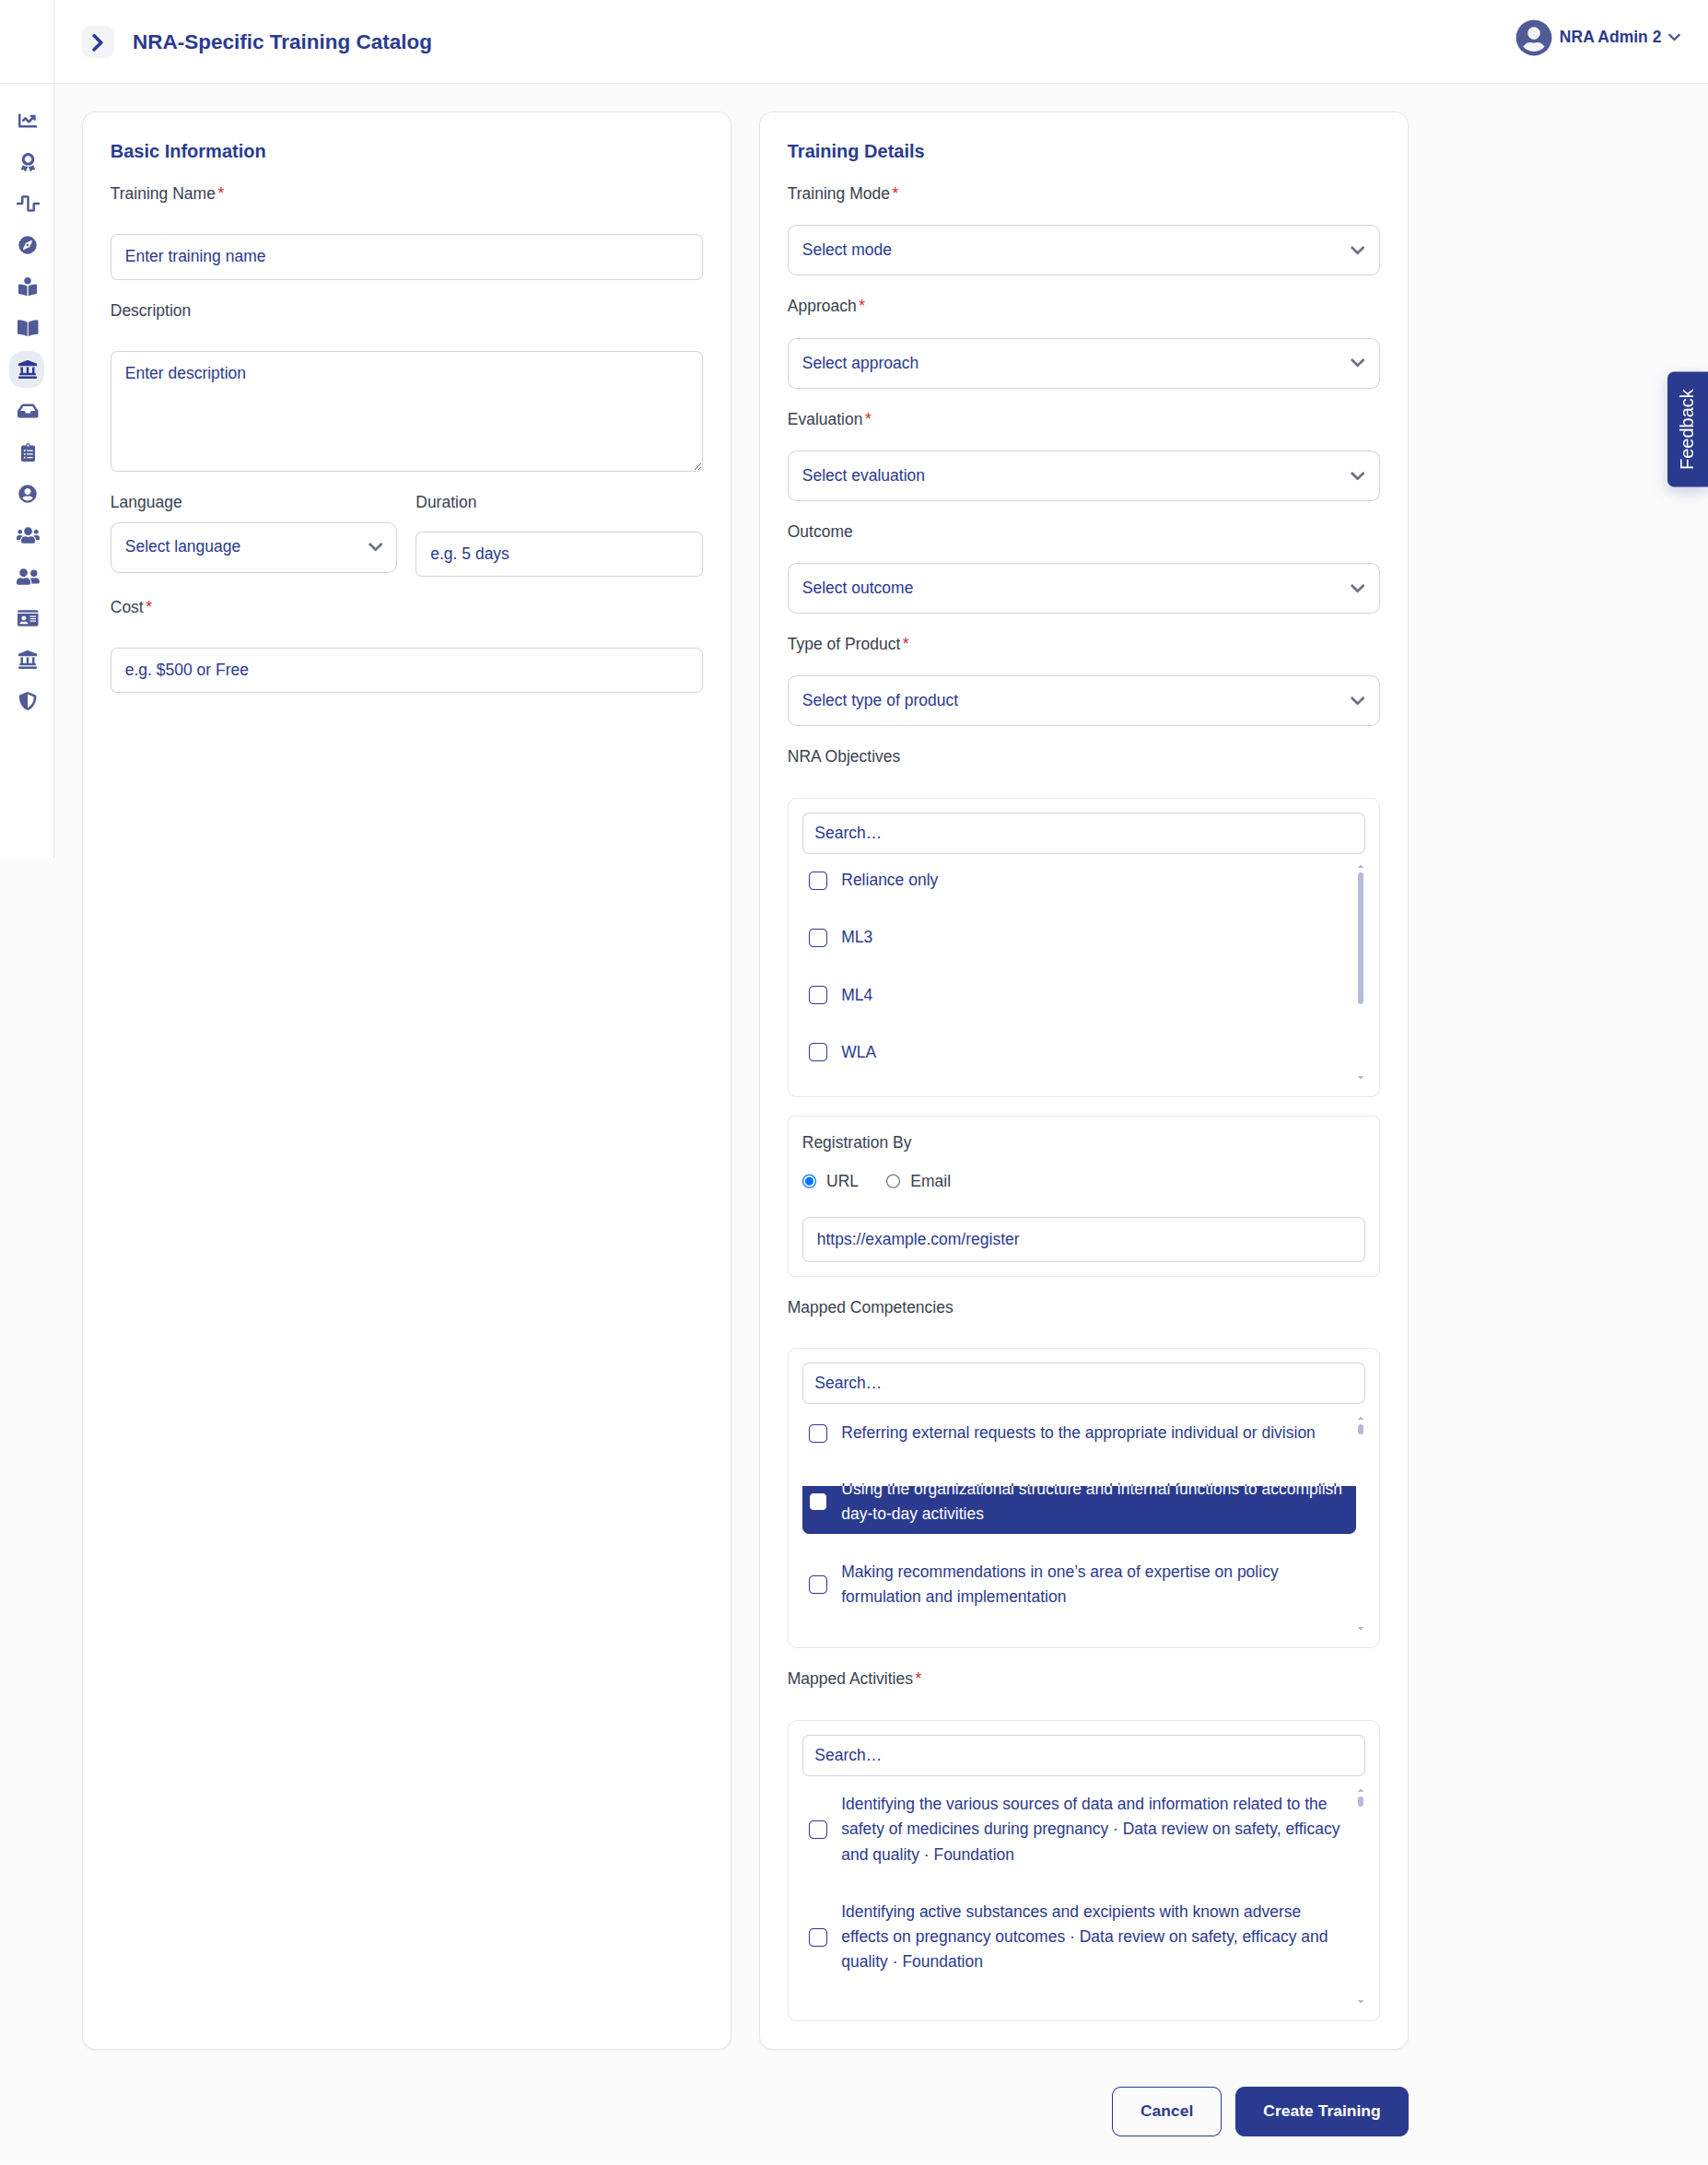
- Enter the training details (see field guide below).
- Click Create Training to save.
What each field means:
Training Name & Description: what the training is and what it covers.
Language: the language the training is delivered in.
Activities: the competency-framework activities this training addresses.
Competencies: the competencies this training maps to.
Outcome
The training appears in your NRA catalogue and can be enrolled in by your users.
Review Training Feedback
The story: After trainees complete a training, they leave feedback. You review it to understand what's working and what needs improvement.
Goal: Read learner feedback on your trainings.
Navigation: Left Navigation → NRA-Specific Training Catalogue
- Click NRA-Specific Training Catalogue in the left navigation.
- In the list, find the training — each row shows Name, mode, and user satisfaction.
- Click the star rating in the User Satisfaction column.
- Read the listed feedback, with each learner's comment and rating.
Outcome
You have a clear read on training quality and can act on feedback for future iterations.
Manage Pending Requests
The story: Requests pile up — access changes, enrolment requests, approvals. You work through the queue so nothing sits unresolved.
Goal: Clear your pending-request queue.
Navigation: Left Navigation → Pending Requests
- Click Pending Requests in the left navigation.
- Open each item to review who requested what, and why.
- Click Approve or Reject.
Outcome
The queue is clear, and every requester knows where they stand.
Add / Update Team Members
The story: Beyond formal accounts, you maintain the broader roster of people associated with your NRA's work.
Goal: Keep your team roster current.
Navigation: Left Navigation → My Team
- Click My Team in the left navigation.
- Click + Add Team Member and select a user from the dropdown to add them.
- Select an existing member to update or remove them.
- Save the changes.
Outcome
Your team roster accurately reflects who is currently involved and in what capacity.
Track Completion & View the Regulatory Passport
The story: You want to confirm your team's completions are recorded correctly and see each person's cumulative learning record — their Regulatory Passport.
Goal: Verify completions and view a user's learning record.
Navigation: Left Navigation → Users
- Click Users in the left navigation.
- Click an NRA user to view their learning record: trainings completed, dates, and competencies achieved.
- Confirm recent completions are reflected accurately.
- Click Regulatory Passport to see the summary.
Outcome
You can vouch for your team's verified competency record, and each user has an up-to-date Regulatory Passport.
Manage the Organization Profile
The story: Your organization profile is your NRA's public-facing record within the network, so it needs to stay accurate.
Goal: Keep your NRA's profile current.
Navigation: Left Navigation → Organization Profile
- Click Organization Profile in the left navigation.
- Update the details: NRA name, website, contact email, country, and overview.
- Click Save Changes.
Outcome
Your NRA's profile accurately represents the authority to the rest of the network.
Manage Your Own Profile
The story: Like every user, you keep your own account details accurate.
Goal: Keep your account information current.
Navigation: Top-right avatar menu → Profile
- Open the Profile page.
- Update fields such as full name, country, language, manager, competency role, about / bio, and profile photo.
- Click Save Changes.
Outcome
Your profile information is current and correctly reflected.