SEARN Secretariat
The SEARN Secretariat is the platform's central administrative and coordination role. It sits above the National Regulatory Authorities and Training Providers, and is responsible for onboarding network members, curating the competency framework and training catalogue, reviewing requests, and maintaining overall governance. The tasks below cover everything a Secretariat user does during the pilot.
Onboard a New NRA
The story: A new National Regulatory Authority is joining the network and its people need access to the platform.
Goal: Add a new NRA so its users can access the platform.
Navigation: Left Navigation → NRA Management → + Add NRA
- Click NRA Management in the left navigation.
- Click + Add NRA.
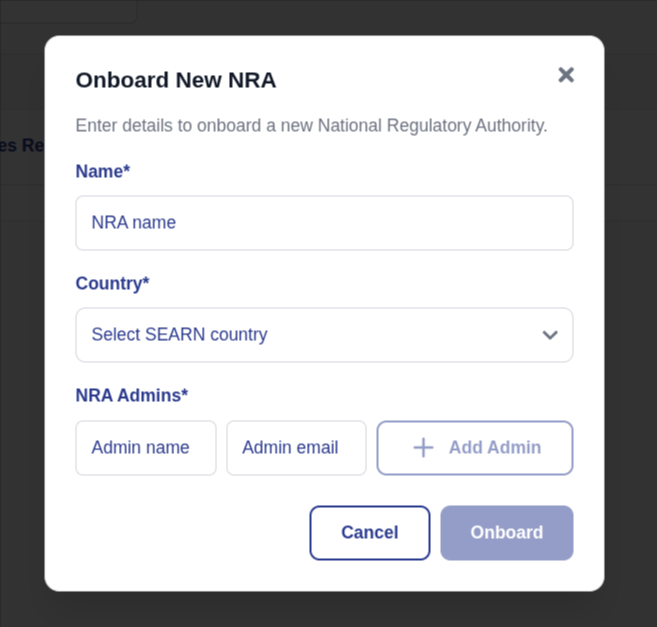
- Enter the NRA details (see field guide below).
- Review the details, then click Onboard.
- Confirm the new NRA now appears in the NRA list.
What each field means:
Country: the country this regulatory authority belongs to.
Organization Name: the official name of the NRA.
Admins (name, email): the person (or people) who will lead this NRA on the platform. They receive the invitation email.
Note
An invitation email is sent automatically to each NRA Admin you list, so they can set their password and log in. Double-check the email addresses before onboarding.
Outcome
The NRA record is created, invitations are sent to its Admins, and the NRA is visible under NRA Management.
Onboard a Training Provider
The story: A Training Provider will deliver trainings mapped to the competency framework and needs to be registered.
Goal: Register a Training Provider organization.
Navigation: Left Navigation → Training Providers → + Add Training Provider
- Click Training Providers in the left navigation.
- Click + Add Training Provider.
- Enter the provider details: Organization Name, Country, and Admins (name, email).
- Click Add Provider.
- Verify the provider appears in the Training Provider list.
Note
An invitation email is sent automatically to each Training Provider contact you add.
Outcome
The Training Provider is registered and can log in to create and submit trainings against the competency framework.
Add a Competency Framework
The story: The competency framework is the backbone of the platform — every training maps to it. The Secretariat defines or updates it.
Goal: Define or update the competency framework (domains, sub-domains, competencies, activities) so trainings can be mapped to it.
Navigation: Left Navigation → Competency Framework
Take your time on this step
The competency framework is what every training is tagged against, so review each entry for accuracy before saving.
- Click Competency Framework in the left navigation.
- Click + Create Framework.
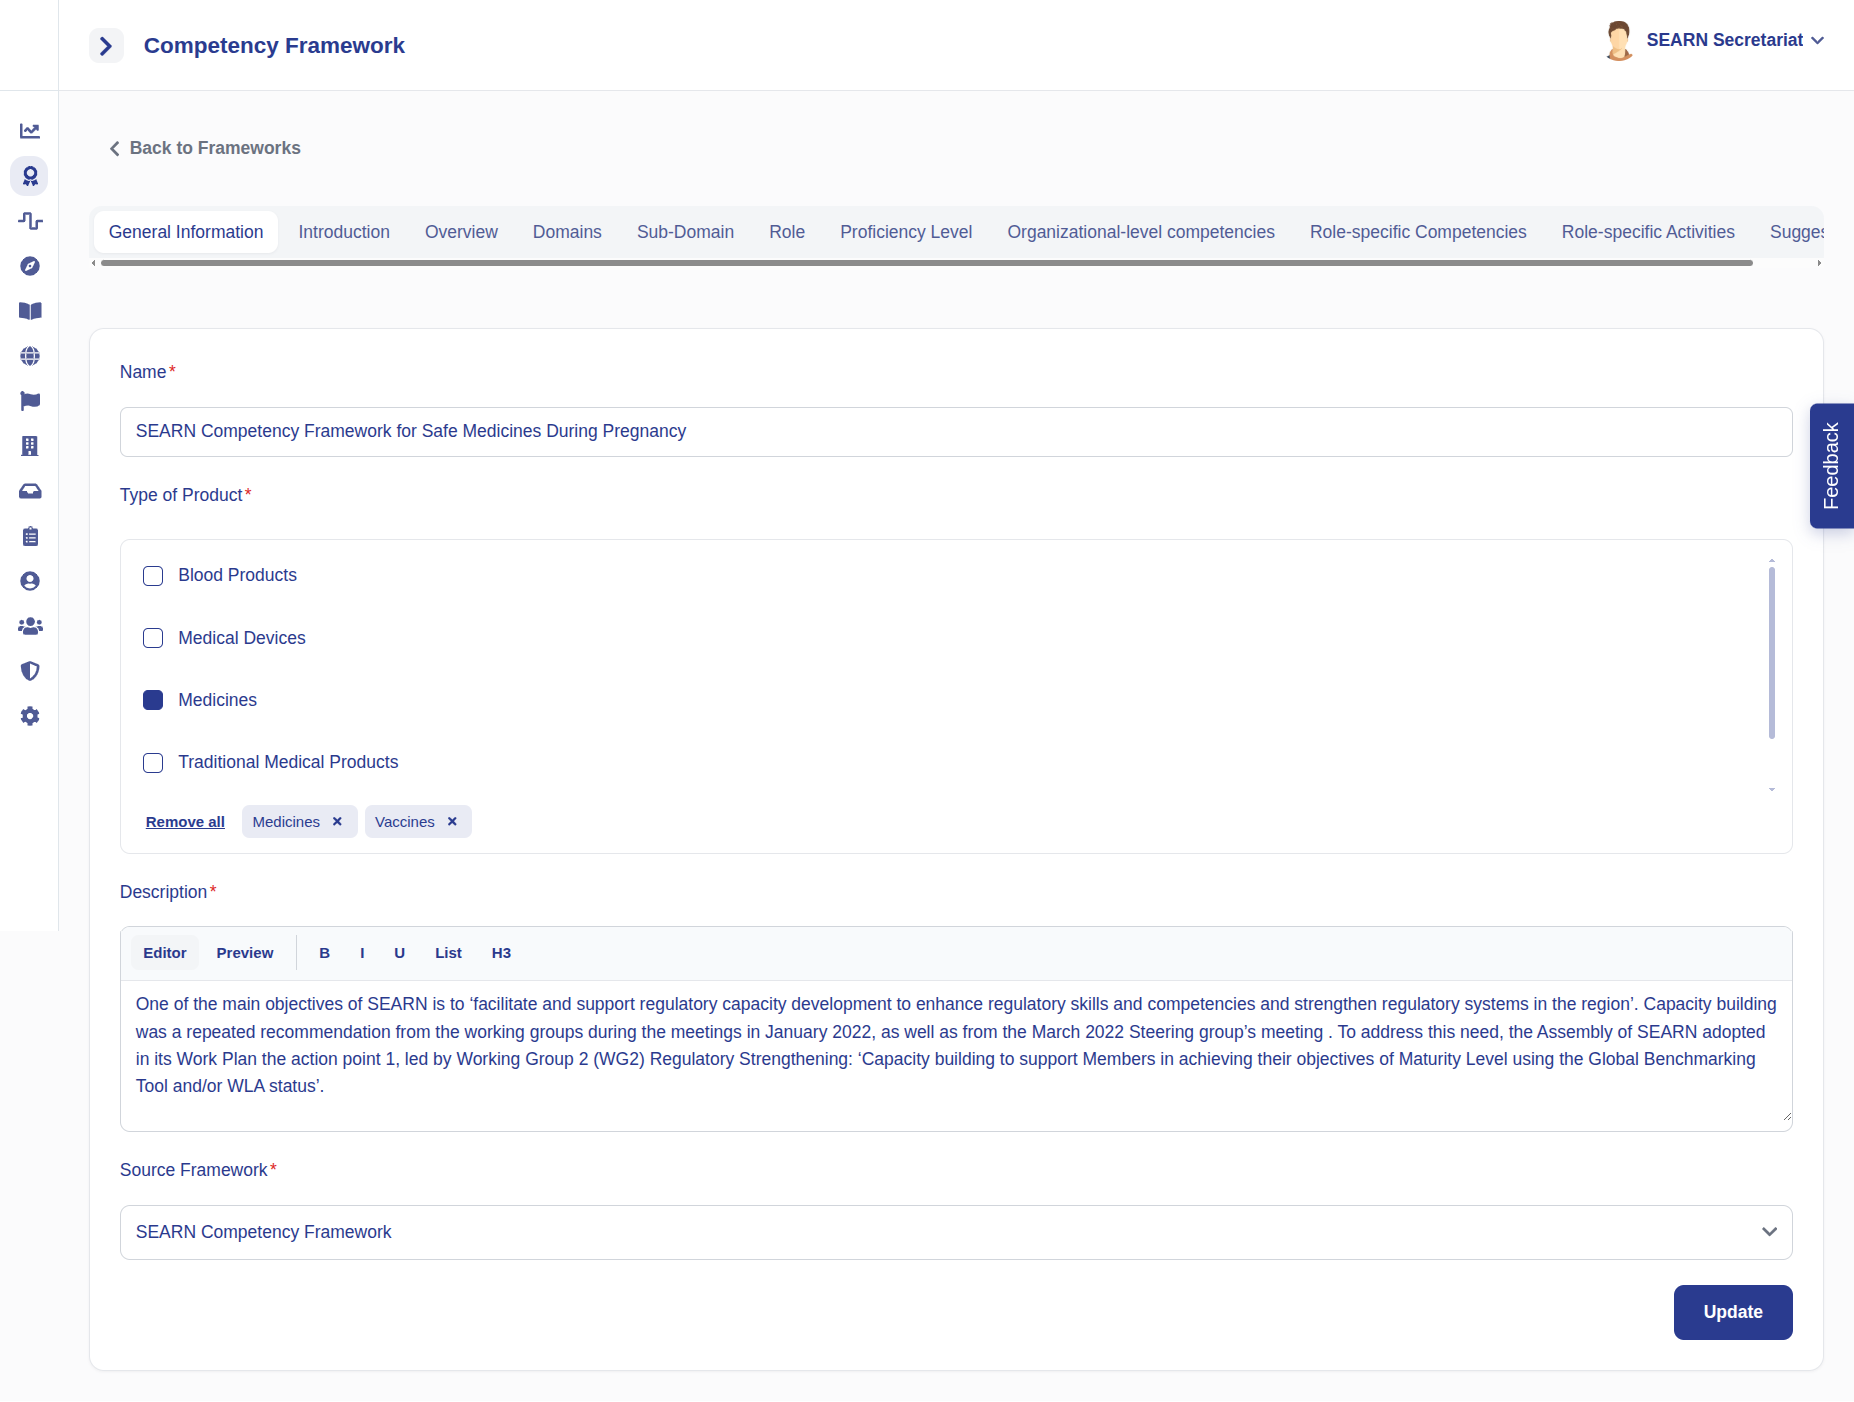
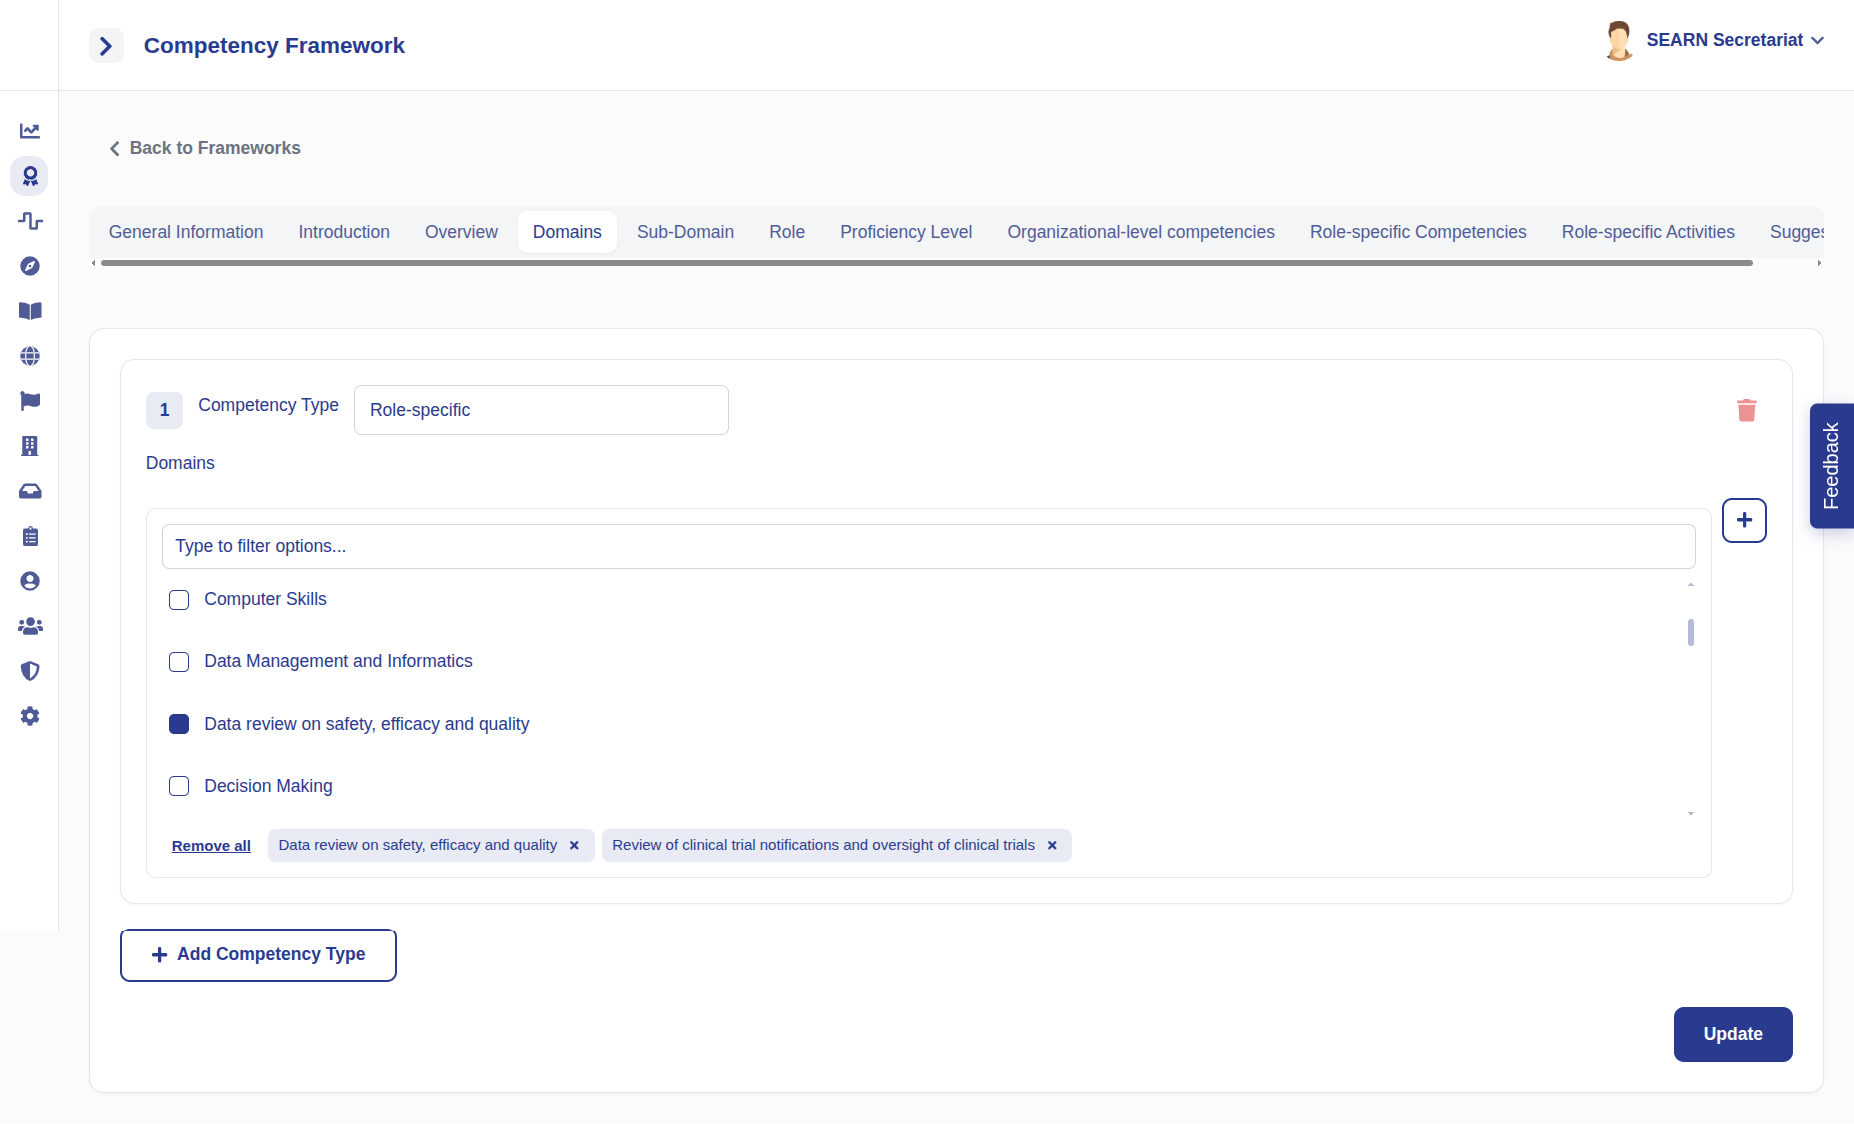
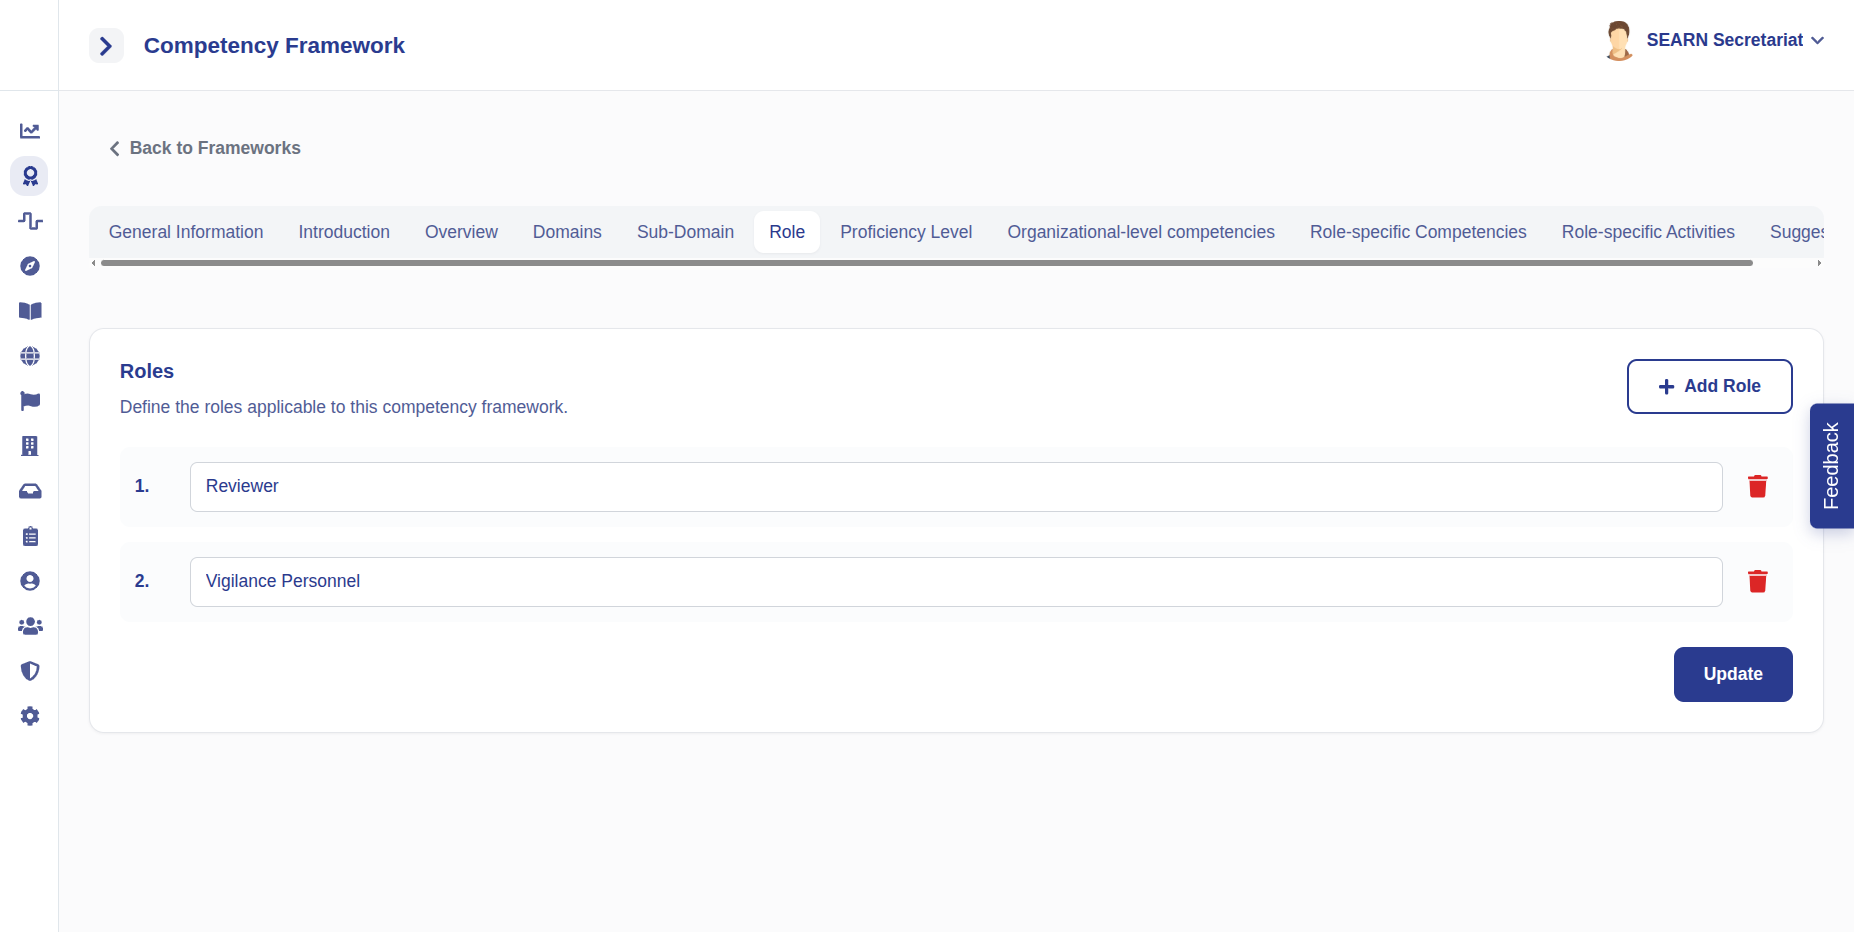
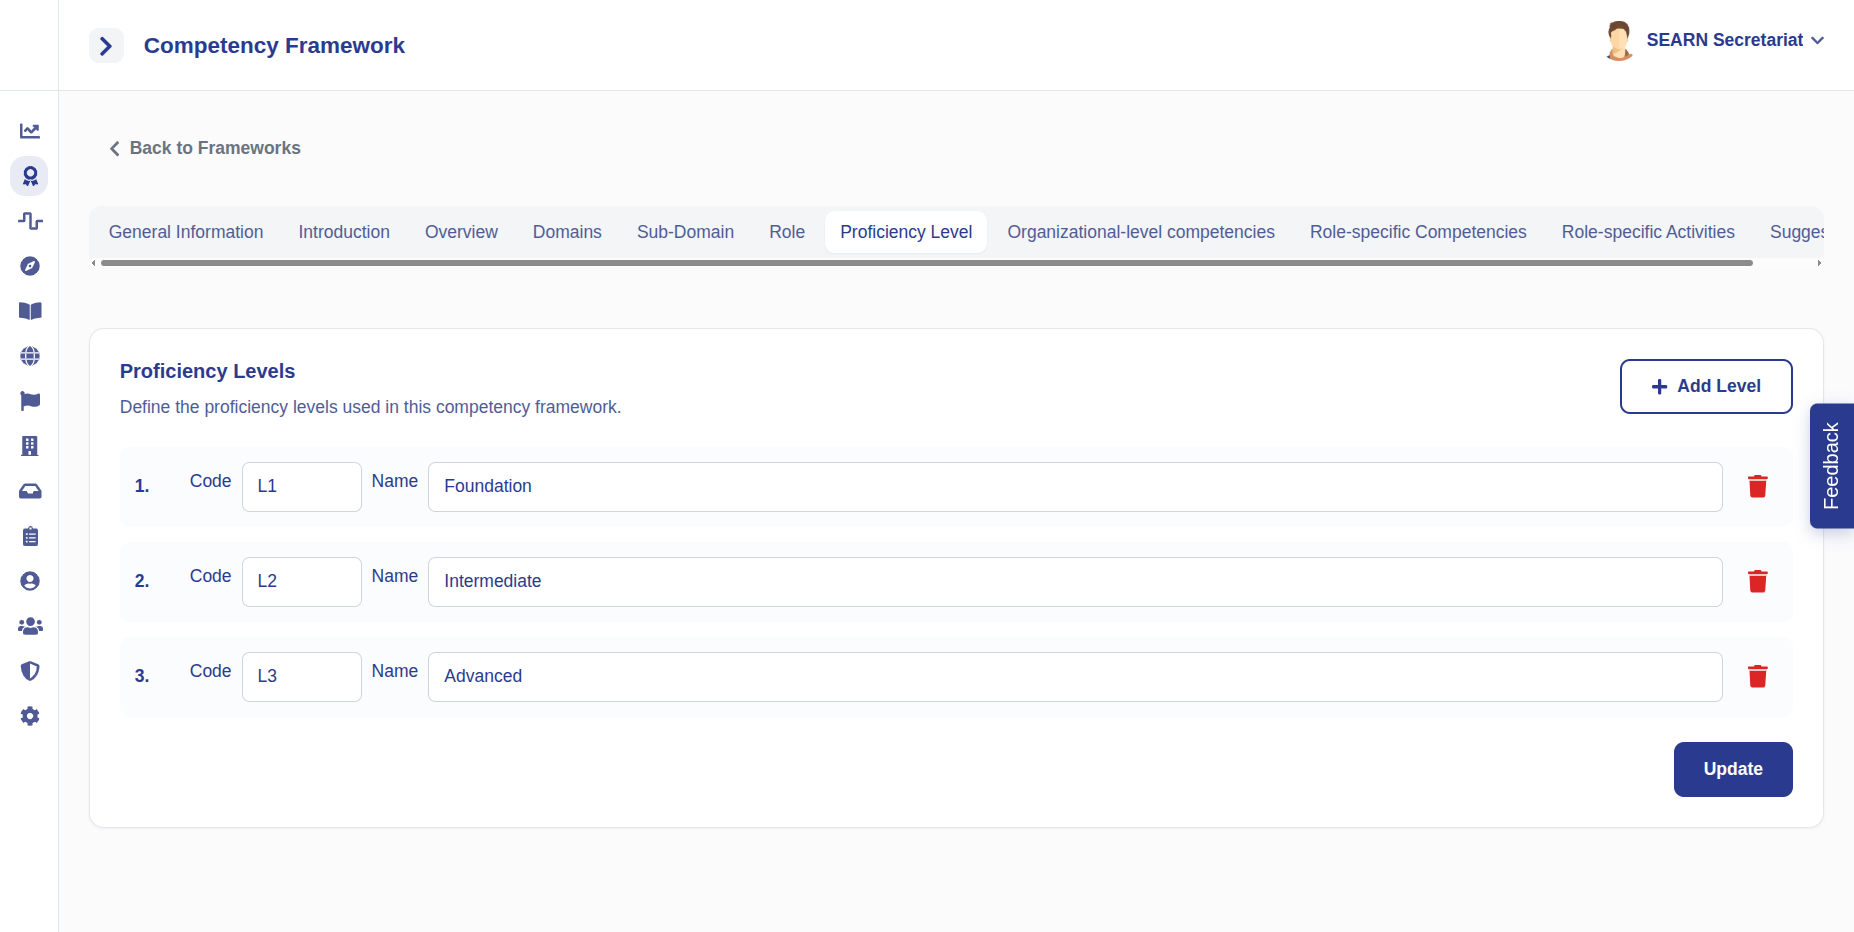
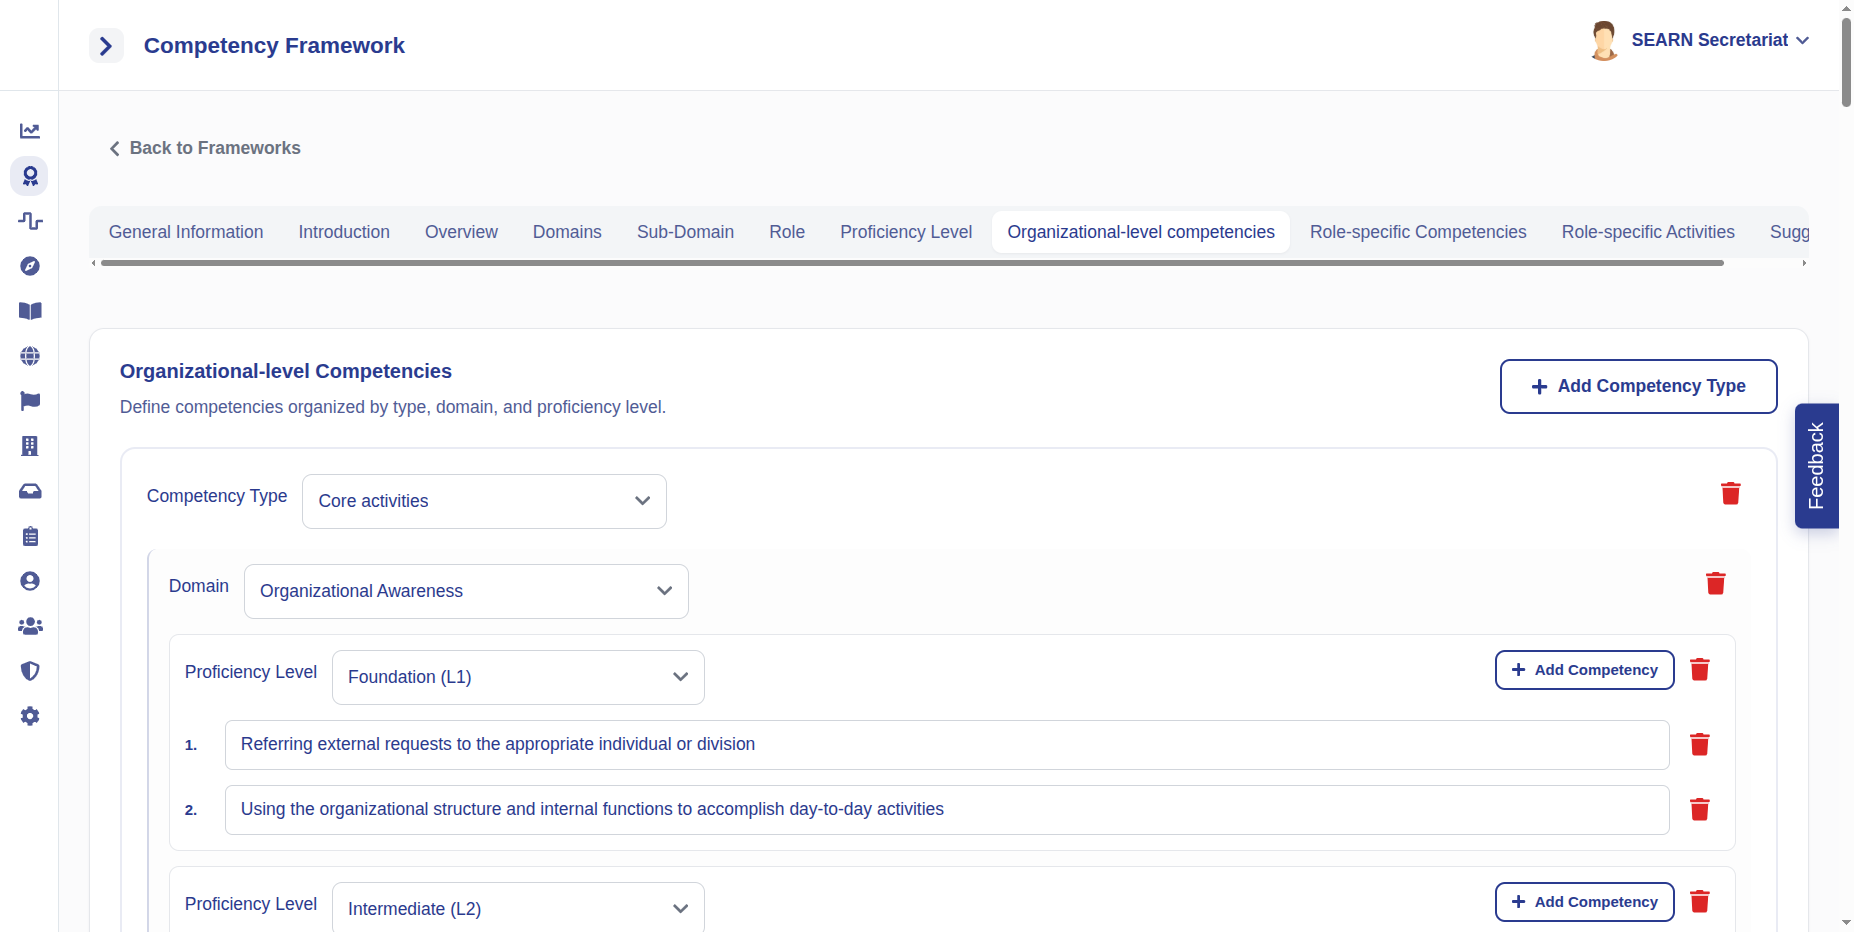
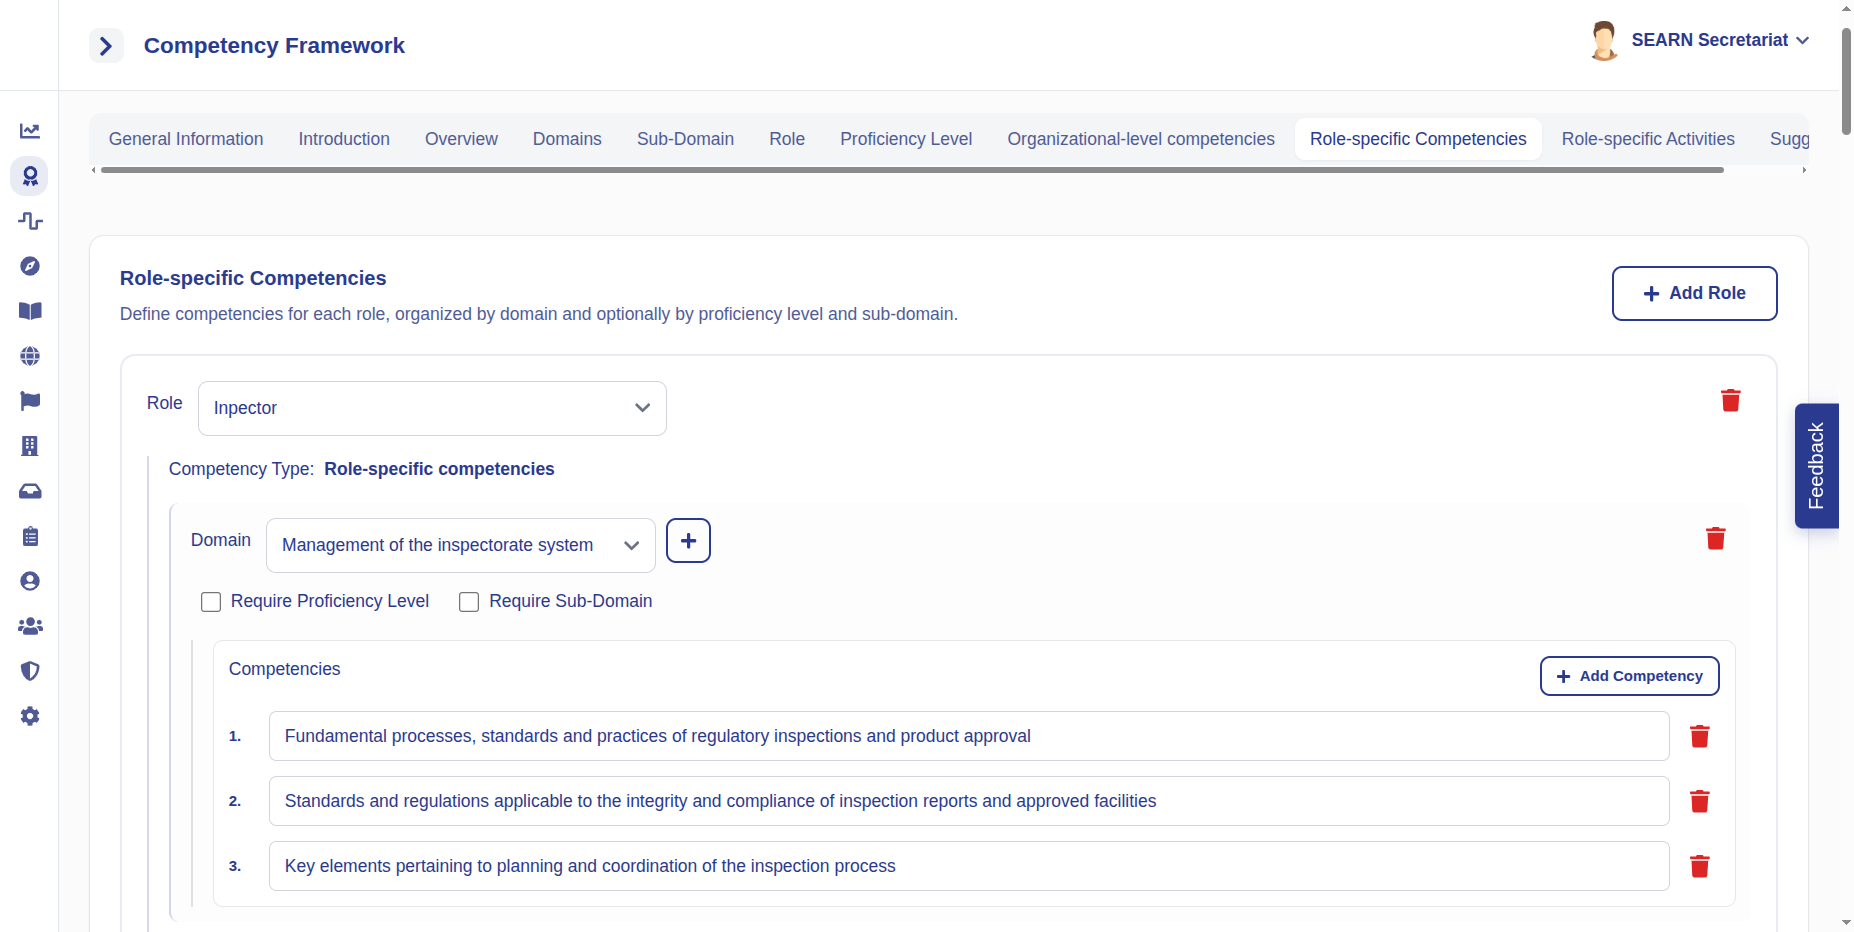
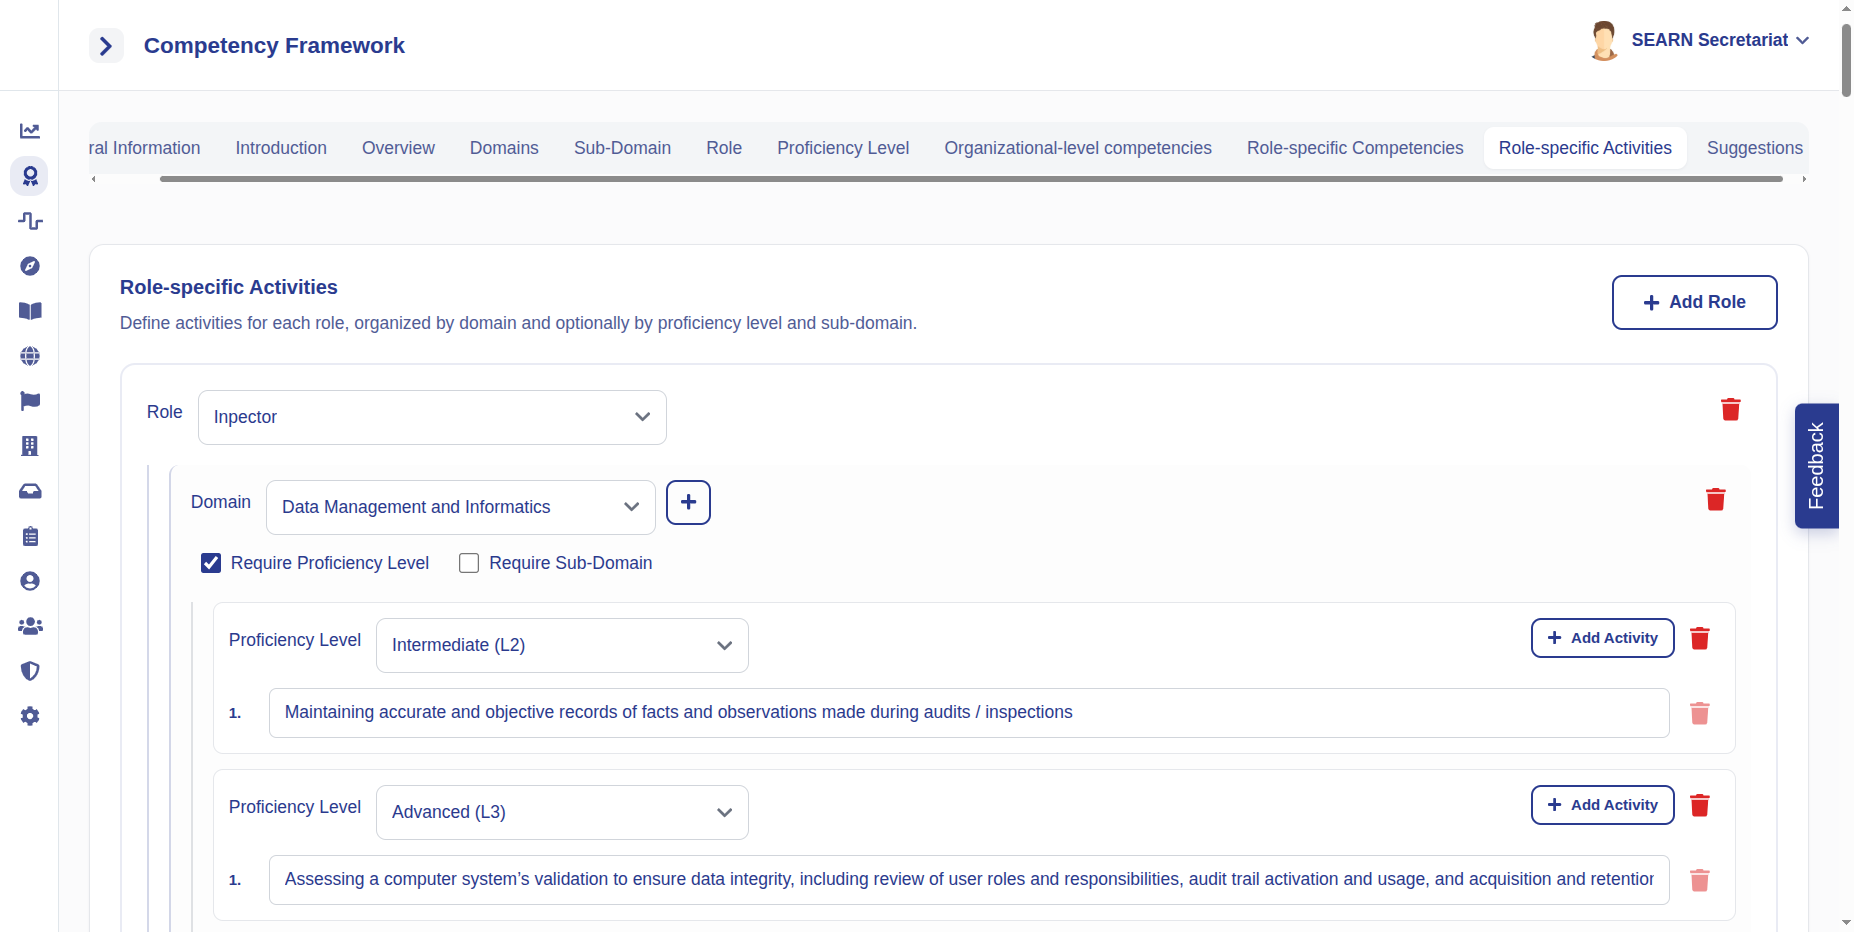
- Work through each step, filling in the required details (see below).
- Review the entered competencies carefully for accuracy.
- Click Save.
What each field means:
General Information & Introduction: the framework's name and a short description of its purpose.
Domain & Sub-Domains: the broad areas of competency and their finer breakdown.
Role & Proficiency Level: who the competency applies to and the expected level of skill.
Organizational-level & Role-specific Competencies: the actual competencies, at both the organization and individual-role level.
Role-specific Activities: the concrete activities that demonstrate each competency.
Outcome
The competency framework is published and becomes available for Training Providers and NRAs to tag their trainings against.
View & Search the SEARN Training Catalogue
The story: The Secretariat needs to see all trainings across the network and spot competencies that still have no training.
Goal: Review all trainings submitted network-wide and identify gaps in coverage.
Navigation: Left Navigation → SEARN Training Catalogue
- Click SEARN Training Catalogue in the left navigation.
- Use the filters — Competency Domain, NRA, Training Provider, Status — to narrow the view.
Outcome
You have a clear view of training coverage against the competency framework, including where gaps remain.
Manage SEARN Countries
The story: The list of participating countries must stay accurate, since it feeds NRA onboarding and reporting.
Goal: Maintain the list of countries in the SEARN network.
Navigation: Left Navigation → Countries
- Click Countries in the left navigation.
- View the list of SEARN countries.
- Click + Add Country to add a new one, or select an existing country to edit it.
- Save your changes.
Outcome
The country list accurately reflects network membership and feeds into onboarding and reporting screens.
Review, Approve & Reject Pending Requests
The story: Administrative requests — onboarding confirmations, access requests, role changes — collect in a queue and need a decision.
Goal: Process pending administrative requests.
Navigation: Left Navigation → Pending Requests
- Click Pending Requests in the left navigation.
- Review the list — each item shows the requester, type, and submission date.
- Open a request to view its full details.
- Click Approve, Reject, or Close.
Outcome
Requests are cleared from the queue and each requester receives a decision, with status updated in the system.
Review Requested Trainings
The story: NRAs and staff request trainings that don't yet exist. The Secretariat reviews the most-demanded ones before creating them.
Goal: Review training requests submitted across the network.
Navigation: Left Navigation → Requested Trainings
- Click Requested Trainings in the left navigation.
- View the list of requests, each showing Title, number of flags (how many people want it), and status.
- Click Close to mark a request as resolved once it has been acted on.
Note
The flag count shows demand. A high number of flags signals a training many users want — a good candidate to prioritise.
Outcome
You can identify highly-requested trainings and create new trainings to meet real demand.
Manage Users (Add, Update, Delete)
The story: The Secretariat administers user accounts across every role on the platform.
Goal: Administer platform user accounts across roles.
Navigation: Left Navigation → Users
Deleting a user is permanent
It removes their access to the platform. Make sure you have selected the correct person before confirming.
- Click Users in the left navigation.
- To add: click + Add User, enter full name, email, role, and country, then click Create User.
- To update: select an existing user, edit their details, and save.
- To delete: select the user, click the Delete icon, and confirm.
Outcome
User accounts are accurately maintained, with access reflecting each person's current role.
Manage Roles & Permissions
The story: Each role should be able to do exactly what its responsibilities require — no more, no less.
Goal: Configure the permission set for each platform role.
Navigation: Left Navigation → Roles
- Click Roles in the left navigation.
- Select an existing role to view its permission matrix, or click + Add New Role to define a new one.
- Select or remove permissions as needed.
- Click Save to apply the changes.
Note
Changes apply immediately. Everyone assigned to a role reflects its new permissions as soon as you save.
Outcome
Role-based access is updated platform-wide.
Manage the Organization Profile
The story: The Secretariat keeps its own organization-level details and branding current.
Goal: Maintain the Secretariat's organization profile.
Navigation: Left Navigation → Settings
- Click Settings in the left navigation.
- Update the organization details: name, logo, description.
- Click Save Changes.
Outcome
Organization-level branding and details are current and correctly displayed to network members.
Manage Your Own Profile
The story: Like every user, the Secretariat keeps their own account details accurate.
Goal: Keep your account information current.
Navigation: Left Navigation → Profile
- Click Profile in the left navigation.
- Update fields such as profile picture, full name, location, language, and about / bio.
- Click Save Changes.
Outcome
Your profile information is up to date.